Thursday, November 29, 2012
Release Party for The Cheesemaker's Apprentice
We finished the draft nearly a year ago, and completed the final revisions early this year. Now the book is available on Amazon and it is time to celebrate!
Join us from 6-7:30 p.m. Wednesday December 5th at Sasha's new venue Cyril's at Clay Pigeon Winery, is located at 815 SE Oak St, Portland, OR 97214
Thursday, July 12, 2012
Building a Home Cheese Cave
The questions that most often comes in through the web site (see the contact information on the home page joyofcheesemaking.com) have to do with building a cheese cave in which to age cheese at home. I wrote an article on this very topic for Culture Magazine that appeared in their Spring 2011. I used to point people to this article online, but it seems to be no longer available. Sasha Davies and I cover home cheese caves in The Cheesemakers Apprentice, but the information was condensed to fit the format of the book. Therefore it seems to me that it is about time to have a blog entry on the subject.
Fresh cheeses such as cream cheese, quark, fromage blanc, and fresh chèvre are ready to be eaten as soon as they are made. Fresh cheeses are the best place to start as a home cheesemaker since you get results so quickly, and good results are usually a lot easier to achieve. However, if you love cheese you probably love the flavors that develop in cheese when it is aged in the proper environment for an extended period of time. Think of how cheddar curds taste, squeaky and fun to chew, but bland. Then consider the full, complex flavors in aged cheddar cheese. Aging cheese at home requires a lot more time and attention, but it is also pretty rewarding to taste and share one of your aged creations.
During aging bacteria and enzymes (and molds in some cases) break down fats and proteins in the cheese. As aging continues, the bacteria run out of food and die, allowing the enzymes within to escape and cause even more break down. It is a counter intuitive, unappetizing process that makes cheese taste so good.
The proper environment in which to age cheese is always moist and cool. How moist and how cool depends on the style. The ideal temperature and humidity fall between 45°F and 58°F (7°C and 14°C) and 80% and 98%, respectively. Traditionally, this environment was provided by a cave, either natural or dug into the ground, and today we still refer to the environment in which aging takes place as a cheese cave.
Some home cheesemakers successfully age cheese in their basements. This can work if the basement maintains a cool temperature less than 60°F (15°C) without too much variation. To keep humidity high, you can place the cheese in a clean shoe box or in sealable plastic container with the lid cracked slightly. This method can work for cheeses like tome, asiago, gouda and havarti that has been waxed or vacuum packed, and perhaps cheddar, all of which are a bit more forgiving. As you get more and more serious about home cheesemaking, you will probably become disappointed with the results from using a basement.
Refrigerators that are built to store wine maintain a temperature in the perfect range for aging cheese, and can usually be set to any temperature between 45°F and 65°F (7-18C). Unfortunately, they usually also use circulation fans. This won’t be a problem for waxed or vacuum sealed cheese, but the air circulation will dry out cheeses that have natural rinds causing them to crack. The best solution is to keep the cheese protected in a ziplock bag, or in a sealable plastic food container. In either case leave the seal or lid slightly cracked to keep the environment surrounding the cheese from getting too humid.
By far the best solution that I have found is converting a mini-refrigerator (dormitory style) into a cheese cave. Start with a small refrigerator without any circulation fans (to avoid the drying and cracking described above). These are the ones that have a small freezer compartment inside at the top with a drip tray underneath. You will probably be able to find cheap mini-refrigerators by searching Craigslist and garage sales. Get an external thermostatic control for about $70 from a local cheesemaking or homebrew supplier, or search the web for external refrigerator thermostat. Plug the refrigerator power into the thermostat and place the thermostat's sensor bulb inside the refrigerator, being careful not to kink its thin tube. The external thermostat will now start and stop the refrigerator, maintaining the proper temperature.

An external refrigerator thermostat

Use a piece of tape to affix the tube to the edge so it does not kink
To increase the humidity, keep an open container of water or a damp towel inside the cave. You monitor the humidity in the cave using a hygrometer, search for a cigar humidor hygrometer for an inexpensive option. To get really serious, buy a remote digital weather station that measures humidity and place the receiver somewhere you look every day, such as by the TV, so you can check it often. An expert blue cheesemaker once told me that it takes months to age a blue cheese, but only 5 hours of the wrong environment to ruin it. It is very disappointing to discover after months of waiting for you cheese to mature, that it has dried out and cracked because you have not been monitoring it closely enough, and I speak from experience on this one.
Most home cheesemakers find they need to build a second cave for blue mold varieties because all cheeses that age with blue cheese tend to become blue themselves. This is less of a problem with bloomy rinds and washed rinds, though I have had cheeses sharing space with washed rind cheese get the characteristic orange hue of their neighbors on them. This didn't bother me as I love the washed rind flavor, but your consumers may object.
Thursday, May 17, 2012
The Cheesemaker's Apprentice
I am pleased to announce that on October 1st, 2012, The Cheesemaker's Apprentice: An Insider's Guide to the Art and Craft of Homemade Artisan Cheese, Taught by the Masters from Quarry Books will be available for purchase. Cheese authority Sasha Davies and I worked on this book, Sasha writing the majority of the text while I developed all of the home cheesemaking recipes. The book is now available for pre-order from most online booksellers.This book is part of a series of books from Quarry, all of which include interviews with experts on the given subject matter. The Brewer's Apprentice, The Vintner's Apprentice, and The Pastry Chef's Apprentice are other books in this same series. For me, the interviews with cheese experts that Sasha put together are one of the major highlights of this book. Aspects of artisan cheesemaking are explored that I have not seen in any other books targeted to the hobbyist. For instance in the chapter on cheddar cheese, Jamie Montgomery of Montgomery's Cheddar gives his opinion on what it means to be a traditional cheddar. Likewise in the blue cheese chapter, an interview with Joe Schneider of Stichelton Dairy is featured. Joe Schneider and Randolph Hodgson of Neal’s Yard Dairy are working to resurrect the original recipe for English Stilton that features raw milk.
Last fall I found myself in a mad scramble last fall to research, develop, make and photograph over 16 recipes for book to meet our writing deadline. The recipes start from the easy fresh cheeses such as cream cheese and chèvre, and progress up to the harder bloomy rinds, blues and washed rinds. I am proud to say that I am confident in each of the recipes, and that with very few exceptions the photographs that accompany the recipes are of the actual homemade cheese for the recipe. This was not an easy feat to accomplish in the three months we had to shoot. Leela Cyd Ross, the photographer with whom we worked, did an amazing job making each cheese look it best.

Keep an eye out for book signings in the Portland area. There will be posts on Twitter and Facebook when these are going to happen. You can find links to the Facebook page and Twitter feed in the left sidebar of this page.
Wednesday, May 16, 2012
Debbie in Italy, Part 4: Sardinian Pecorino
Pecorino Fascere
Fascere is a traditional Sardinian cheese. Giovanni and Giovanna were both originally from Sardinia and moved to Tuscany about 25 years ago. As the people of Tuscany moved abandoned their farms and moved to more urban areas in latter half of last century, it became common for Sardinians to purchase the farms and take over the Tuscan cheesemaking traditions. In the case of the Porcus, they still keep their Sardinian cheesemaking heritage alive with their Sardinian milk sheep and their Pecorino Fascere.
This was my favorite cheese at Podere Paugnano. It was the least sheepy and had a little sharpness and great flavor without being too strong.
The steps are the same as the for Stagionato except for slightly lower cooking temperature and the use of a special wooden hoop mold, pictured below.
Pecorino Fascere
Cheese molds: the Fascere hoops are on the right; the tall cylinder of molds all the way to the left were for Pecorino Stagionato; round, partially conical molds are for ricotta.
Instructions:
1. Heat milk to 37-38C.
2. Add rennet and stir for 1 minute.
3. Let set for 20 minutes, or until clean break.
4. Cut curd into rice size pieces, then continue to agitate for 15 minutes, maintaining the curd at 37-38C.
5. Pour into the Fascere molds. (These are tear-drop shaped hoops of wood secured with twine - see photo.)
6. Use hands to press curd in molds and expel whey. As curds compress, add more curd and repress so that curd is level or nearly level with top of mold.
7. Maintain temperature of curd at 37-38C while allowing to drain freely for 45 minutes.
8. Flip the entire mold (do no remove the cheese from the mold).
9. Tighten the hoop to return the curd level to the top of the mold (the curd contracts/shrinks as it loses whey during draining)
10. Return to 37-38C environment for 45 minutes.
11. Flip and tighten again.
12.. Return to 37-38C environment for 20 minutes.
13. Keep cheese in molds and transfer to room temperature rack (low 70s). Store at room temperature for 1 day.
14. After the day at room temperature, unmold, flip, apply a generous coating of salt to the surface of the cheese and return to mold. Let sit for 5 hours per kilogram of cheese. (For example, if you have a 1 kg cheese, let salt sit on cheese for 5 hours. If you have a 2 kg cheese, let salt sit on cheese for 10 hours.)
15. After the salt has absorbed for the appropriate amount of time, unmold and rinse salt from cheese.
16. After rinsing salt from cheese, place unmolded cheese in 12-16C environment for 10 days.
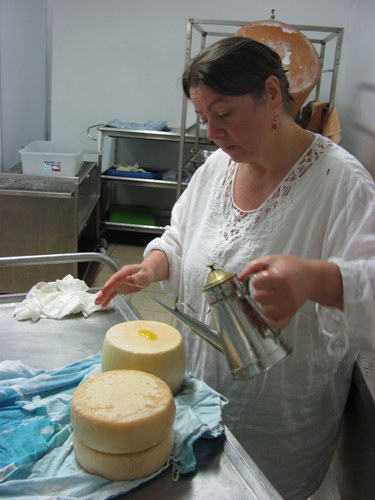
17. After 10 days at 12-16C, apply a thin coating of oil or tomato juice.
18. Return to the 12-16C environment for:
Small (<1 kg): up to 3 months
Large (2+ kg) 5-6 months
Wash mold from cheese with water and pat dry before cutting/serving.
Tuesday, May 15, 2012
Debbie in Italy, Part 3: Aged Pecorino
Pecorino Semi-Stagionato, Pecorino Stagionato, Pecorino Vecchio and Grating Pecorino
The only difference between these four cheeses is the aging period. Semi-stagionato (semi-aged) ages for 2-4 months. Stagionato ages for 4-6 months. Vecchio (old) ages for 6-12 months. Pecorino suitable for grating ages for 12 or more months.
Pecorino Marzolino Lucardo on the left and Pecorino Stagionato on the right
It was very eye opening to realize that in the US we typically only have access to pecorino that is aged long enough for grating! Podere Paugnano hardly had any of this variety - it definitely did not seem preferred and I don’t think they ever sold it. This could have had something to do with limited aging space, but it seemed more to do with their taste preferences.
Once again, the instructions are nearly identical to the Base Recipe: Pecorino Fresco Bianco. In this case, the target temperatures are slightly different, the curd is cut into smaller pieces, a greater amount of salt is applied (though for the same amount of time) and the temperature of the aging cave is slightly higher.
The longer the pecorino ages, the sharper the flavor. So the semi-stagionato is softer and mostly mild, while the stagionato and vecchio get progressively firmer, sharper and more flavorful.
The instructions are identical to the Base Recipe: Pecorino Fresco Bianco, but with slight changes in all of the target temperatures and a longer aging period.
Instructions:
1. Heat milk to 40-42C.
2. Add rennet and stir for 1 minute.
3. Let set for 20 minutes, or until clean break.
4. Cut curd into rice size pieces, then continue to agitate for 15 minutes, maintaining the curd at 40-42C. (The higher end of the temperature range results in a firmer cheese, which is typically preferred for stagionato.)
5. Pour into molds (no leader needed). (They typically used approximately 8-inch high, 8-inch diameter molds)
6. Use hands to press curd in molds and expel whey. As curds compress, add more curd and repress so that curd is level or nearly level with top of mold.
7. Maintain temperature of curd at 40-42C while allowing to drain freely for 45 minutes. The Porcus used a covered draining table that they filled with steam.
8. Flip cheese in the mold. (No need to apply pressure again.)
9. Return to 40-42C environment for 45 minutes.
10. Flip again.
11. Return to 40-42C environment for 20 minutes.
12. Keep cheese in molds and transfer to room temperature rack. Store at room temperature for 1 day.
13. After the day at room temperature, unmold, flip, apply a generous coating of salt to the surface of the cheese and return to mold. Let sit for 5 hours per kilogram of cheese. (For example, if you have a 1 kg cheese, let salt sit on cheese for 5 hours. If you have a 2 kg cheese, let salt sit on cheese for 10 hours.)
14. After the salt has absorbed for the appropriate amount of time, unmold and rinse salt from cheese.
15. Place the cheese in 12-16C environment for 10 days.
16. After 10 days at 12-16C, apply a thin coating of oil or tomato juice.
17. Return to the 12-16C environment for:
Semi-stagionato: 2-4 months
Stagionato: 4-6 months
Vecchio: 6-12 months
Grating cheese: 12+ months
18. Wash mold from cheese with water and pat dry before cutting/serving.
Pecorino Stagionato in the "aged cheese" aging room, kept between 12 and 16C
Pecorino Marzolino & Pecorino Marzolino Lucardo
Marzolino is identical to Stagionato, except:
- it must be made with milk produced from March through July
- it undergoes additional/firmer hand pressing when placed in the mold
- the aging environment is slightly more humid. This is achieved by covering the cheese with a cloth for the first month of aging. Be sure to rotate the cheese so that it does not become lopsided or stick to the cloth.
Pecorino Marzolino Lucardo in the aging room
The only difference between Marzolino and Marzolino Lucardo is the pressing method. The Lucardo is pressed in a linen sack (it looks a little like a sock for a very large foot) and hand squeezed very firmly. The salt is applied while the cheese is still in the sack.
Since the late spring/early summer milk is the best milk (the sheep are grazing on the best grass at this time), this is considered one of the best cheeses. I found the flavor to be great.
Sunday, May 22, 2011
Debbie in Italy, Part 2: Fresh Pecorino
Base Recipe: Pecorino Fresco Bianco
(This is the base recipe for most of Podere Paugnano's other cheeses and I'll refer to it in all other pecorino entries.)
One of the simplest and the freshest cheese made at Podere Paugnano was their Pecorino Fresco Bianco, which translates to Fresh White Sheep-Milk Cheese. It is fresh and white because it hasn't had a chance to develop any rind. They used the same recipe for the Fresco Bianco as for their aged cheeses, but stored it at a cooler temperature and sold it within 10 days of production.
All sheep milk cheeses are called pecorino. In Italian pecora means sheep, and pecorino is the name for any sheep milk cheese. You'll see in this recipe and the recipes that follow that pecorino cheeses in Italy come in a much, much wider variety than pecorino in the US, where pecorino usually refers to a variety aged 12 months or more so that it is hard enough for grating. At least 95% of what the Porcus produced was aged less than a year.
One thing you'll notice right away about the recipe is that it does not call for any starter culture. Podere Paugnano produced all organic, raw cheeses and did not use any cultures, which is the traditional method of pecorino production. Even the other creamery I visited was surprised at this technique. It is surprising because it is somewhat risky from a health and consistency perspective: starter cultures tend to crowd out any less-desired or harmful bacteria in the milk and also impart a fairly consistent flavor. And yet this technique allows the terrior to shine through.
Ingredients:
12 liters raw sheep milk
7 g rennet dissolved in water just before adding to milk
Notes:
- They used animal rennet in paste form or vegetable rennet in liquid form, depending on the batch
- The rennets used in Italy are 1:20,000 (single strength) and 1:10,0000 (double strength) while the rennet we use in the US is typically 1:15,000 (single strength) and 1:7,500 (double strength). So for this recipe, 7g of single strength Italian rennet is equal to 9 1/3g of single strength American rennet.
Instructions:
1. Heat milk to 40C.
2. Add rennet and stir for 1 minute.
3. Let set for 20 minutes, or until clean break (I was visiting at the end of the lactation cycle and due to the impact of the sheep's hormonal changes on the coagulation properties of the milk it took about an hour for the milk to set. So the set time can vary tremendously based on season.)
4. Cut curd into corn size pieces, then continue to agitate for 15 minutes, maintaining the curd at 38-40C the entire time.
5. Pour into molds (no leader needed). (They typically used approximately 8-inch high, 8-inch diameter molds)
6. Use hands to press curd in molds and expel whey. As curds compress, add more curd and repress so that curd is level or nearly level with top of mold.
7. Maintain temperature of curd at 38-40C while allowing to drain freely for 45 minutes. The Porcus used a covered draining table that they filled with steam.
8. Flip cheese in the mold. (No need to apply pressure again.)
9. Return to 38-40C environment for 45 minutes.
10. Flip again.
11. Return to 38-40C environment for 20 minutes.
12. Keep cheese in molds and transfer to room temperature rack. Store at room temperature for 1 day.
13. After the day at room temperature, unmold, flip, apply a thin coating of salt to the surface of the cheese and return to mold. Let sit for 5 hours per kilogram of cheese. (For example, if you have a 1 kg cheese, let salt sit on cheese for 5 hours. If you have a 2 kg cheese, let salt sit on cheese for 10 hours.)
14. After the salt has absorbed for the appropriate amount of time, unmold and rinse salt from cheese.
15. Place unmolded cheese in 8C environment for up to 10 days.
Tool used for curd cutting as well as agitating the curd after cutting
Pressing the curd and then adding more curd to each mold as the curd level dropped due to whey expulsion.
Final hand pressing of the curd.
Flipping the cheese
The "fresh cheese" aging room, kept at 8C
Pecorino Fresco Abbucciato
This is a fresh sheep milk cheese "with skin" (abbucciato). It is made using the exact same recipe as Pecorino Fresco Bianco, but oiled (to aid in rind development) and aged longer.
Instructions:
Follow steps 1-14 in the Base Recipe: Pecorino Fresco Bianco.
15. After 10 days of aging at 8C, apply a thin coating of olive oil to the cheese. This is an optional step. Alternately, Giovanna mentioned that she sometimes likes to coat with tomato juice instead of olive oil.
16. Return to 8C storage for up to 3 months.
17. Wash mold from cheese with water and pat dry before cutting/serving.
Oiling the cheese after 10 days aging. These wheels will then return to the aging room for further aging. (Two unidentified types of pecorino are being oiled in this photo.)"
Pecorino Fresco Abbucciato ready for sale
Pecorino Erborinato
This recipe is for a sheep milk blue cheese, but I have no idea what makes it blue. I watched Giovanni make a batch of this and he didn't add any molds or culture and they don't poke any holes in it. When it does get some blue, it's only a small amount (as far as I could see in the wheels they broke open while I was there). I found that I particularly enjoyed the flavor of this cheese because it was not too sheepy and had a creamy flavor.
The instructions are identical to the Base Recipe: Pecorino Fresco Bianco, but with slight changes in all of the target temperatures and a longer aging period. Even though this is aged for up to 4 months, the Porcus still considered this a fresh cheese. I think this was mainly because it was aged in the 8C cave with the other fresh cheese.
Instructions:
1. Heat milk to 38C.
2. Add rennet and stir for 1 minute.
3. Let set for 20 minutes, or until clean break.
4. Cut curd into corn size pieces, then continue to agitate for 15 minutes, maintaining the curd at 43C the entire time.
5. Pour into molds (no leader needed). (They typically used approximately 8-inch high, 8-inch diameter molds)
6. Use hands to press curd in molds and expel whey. As curds compress, add more curd and repress so that curd is level or nearly level with top of mold.
7. Maintain temperature of curd at 30C while allowing to drain freely for 45 minutes. The Porcus used a covered draining table that they filled with steam.
8. Flip cheese in the mold. (No need to apply pressure again.)
9. Return to 30C environment for 45 minutes.
10. Flip again.
11. Return to 30C environment for 20 minutes.
12. Keep cheese in molds and transfer to room temperature rack. Store at room temperature for 1 day.
13. After the day at room temperature, unmold, flip, apply a medium coating of salt to the surface of the cheese and return to mold. Let sit for 5 hours per kilogram of cheese. (For example, if you have a 1 kg cheese, let salt sit on cheese for 5 hours. If you have a 2 kg cheese, let salt sit on cheese for 10 hours.)
14. After the salt has absorbed for the appropriate amount of time, unmold and rinse salt from cheese.
15. Place unmolded cheese in 8C environment for 10 days.
16. After 10 days at 8C, apply a thin coating of oil.
17. Return to the 8C environment for 1 to 4 months.
18. Wash mold from cheese with water and pat dry before cutting/serving.
The salting step for a batch of erborinato
Sunday, May 8, 2011
Debbie in Italy, Part 1: Cheese Voyeur in Italy
This past autumn, fueled purely by a passion for cheesemaking, I quit my jetsetting job at a design consultancy in Portland, OR and headed to Italy to apprentice (a.k.a. volunteer as a migrant worker) at a pecorino formaggeria in Tuscany. While there, I managed to land a second gig at a buffalo and cow milk cheese producer in Jesi, Italy.
This was too good of an experience not to share with the greater cheesemaking community, so through this blog I’ll share everything I can about the experience - the recipes, tools and techniques from the two creameries where I was lucky enough to make cheese alongside masters of the craft.
But first I should answer the two questions I get asked most often when I tell others about my experience. Why cheesemaking? Why Italy?
At the time of my trip I was honestly at a loss to explain, but after months of impassioned cheesemaking plus some space to ruminate, my mind slowly made sense of what felt like a primal need to make cheese.
My original career choice was product design - a degree program that offered a perfect balance of thinking and making. The path I wound up following in the decade since graduation resulted in countless PowerPoint decks, an encyclopedia worth of carefully crafted email communications, and what felt like a barely perceptible role (by the time the product hit the shelf) in the production of printers, air conditioners, and credit cards. As a manager of the people designing these products, it was hard to put my finger on what I did every day since there was little if anything to physically show for my work.
In cheesemaking, my day-long efforts resulted in something that could be consumed through all the senses. It fed my needs for craft and gave me something to “show” for my work that could be appreciated by others. To my surprise, it also required an incredible amount of thinking. I found myself so wrapped up in dosage conversions, acidity titrations and discerning which strains of bacteria to use that I was unable to talk at times, much to my husband’s consternation.
My choice to study in Italy was a little less philosophical. In early 2010 my sabbatical was approaching (I hadn’t yet decided to leave my job). Combining my cheesemaking hobby with some travel seemed like an ideal sabbatical pursuit. I had already traveled a good bit in France can’t stand to eat goat cheese, so France didn’t seem like the best option. I love cheddar cheese, but heading to England didn’t seem like as much of an adventure as I was hoping for. On the other hand, Italians make great non-goaty cheese and I’d never been there. And with that logic worked out, I became a woman on a mission to find cheesemakers in Italy.
After months of looking for ways to make contact, an employee at The Cheese Bar recommended looking into the organizations Farm Exchange and World Wide Opportunities in Organic Farming (WWOOF), both of which are organizations that connect farms in need of an extra hand with volunteers who want to work on farms. WWOOF had many more cheesemakers on their list so I paid $35 to join the Italian chapter and began sending emails to all the cheesemakers without goats.
After receiving several notes explaining that the sheep weren’t going to be producing any milk at the time of my visit (learning #1: lactation cycles of sheep) and no replies for cow owners, one family replied that if I got my tookus there quickly I’d get to do some cheesemaking with them before their herd went dry for the season.
I had just left my job the week before, so I was free to flit off to Italy. So I booked a ticket, checked out a stack of Italian language learning books from the library, and 3.5 weeks later was on a flight to Rome.
After about 36 hours of air, train, subway and bus travel, I arrived just past nightfall to Podere Paugnano in Radicondoli, Tuscany, about 30 miles west of Siena. I was welcomed by owners Giovanni and Giovanna Porcu, along with their daughters Tamara and Natalie.
Giovanna and Giovanni, my kind and wonderful hosts in Radicondoli, Tuscany
Entrance to Giovanni and Giovanna's Agrotourismo (working farm bed and breakfast) and Cheese Shop
The Porcu's herd of Sardenian milk sheep.
The Formaggeria (cheese shop)
In addition to 300 Sardinian milk sheep and the formaggeria, Podere Paugnano includes an agrotourismo (a working farm bed and breakfast), a variety of farm animals and a by-reservation restaurant of sorts in which Giovanna prepared phenomenal five- to seven-course meals for local or international guests in her kitchen.
After nearly two weeks of working and studying at Podere Paugnano, one of their agrotourismo guests very kindly arranged my second apprenticeship with his sister- and brother-in-law, Giulia and Antonio Trionfi, who run Caseificio Piandelmedico in Jesi (Ancona province) near the Adriatic coast.
Caseificio Piandelmedico
A buffalo calf that was born on the first day I arrived
Antonio managed the feed and care of their 150 Asian water buffalo and 150 milk cows (of varying breeds) while Giulia, with assistance from her husband Chris, managed the creamery. They produced milk, mozzarella, yogurt, and a wide range of fresh and aged cheeses.
I kept a separate blog of my travel experiences along with the many amazing Italian food recipes I learned from Giovanna, including quite a few that utilized their outstanding pecorino cheeses, at www.brettanddebbie.com (see the September and October 2010 archives).
In this blog I will focus on cheesemaking techniques and the recipes I learned at Podere Paugnano and Caseificio Piandelmedico. I’ve been able to test nearly all of the recipes I learned at Piandelmedico, but am still looking for sheep milk so I can try out the recipes from Podere Paugnano. Please let me know if you have a connection or if you are able to give the recipes a try!
My hope is that this blog comes alive with comments, experiences and suggestions from the readers and cheesemakers out there. Let the discussion begin!
Wednesday, March 2, 2011
Retro-fitting a mini-refrigerator article in Culture Magazine
Monday, October 4, 2010
Homegrown Rennet
How do you extract the rennet from the thistle? A Google search for "Thistle Rennet" turns up pages that reference the book "The Encyclopedia of Country Living:
An Old Fashioned Recipe Book" by Carla Emery. This book recommends the following:
Gather the thistle flowers when they have turned brown. If you see thistledown, the plant is over-mature. Get it right after the end of bloom and before the stage where down blows away. Air dry the flowers.
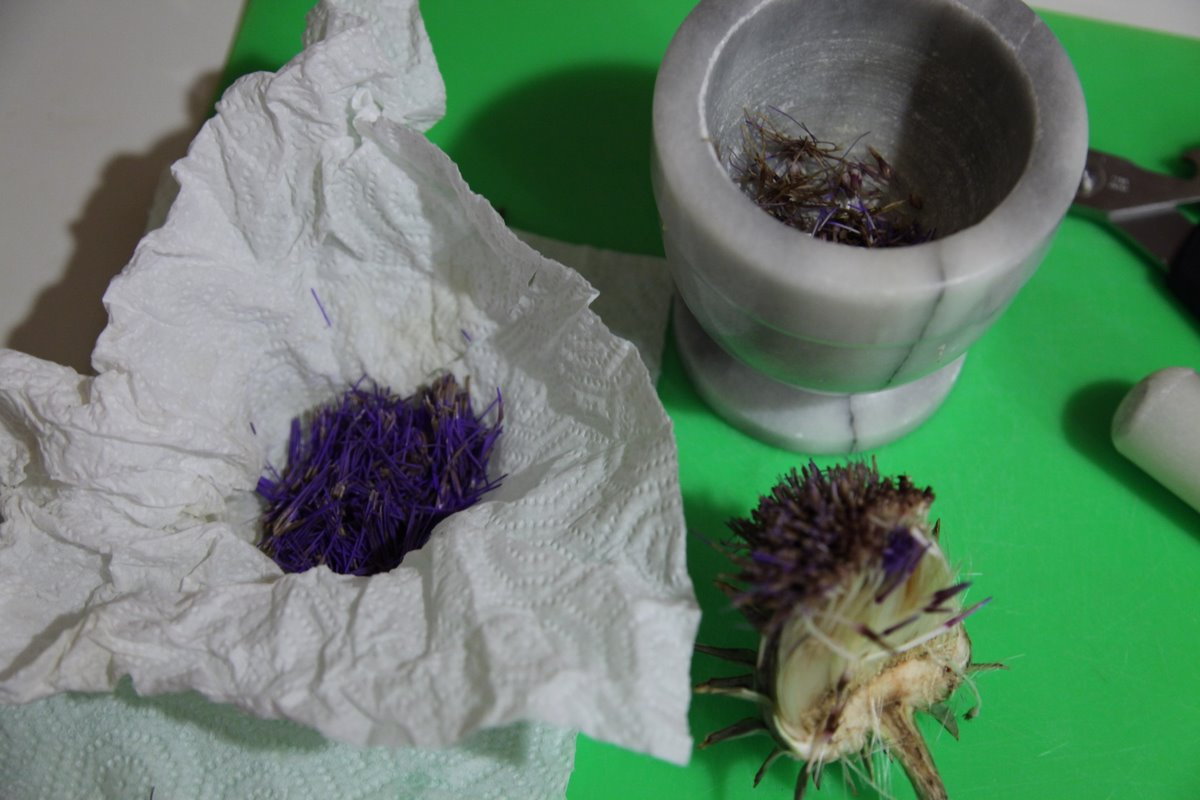
This confused me because everything I had read and heard on the subject indicated that the purple stamens were the part of the plant that held the rennet. Not wanting to waste my thistle or my expensive raw milk, I sent an email to cheesemaker Alyce Birchenough of Sweet Home Farm. Alyce was mentioned in a spring 2010 Culture Magazine article on thistle based rennet cheeses and she was kind enough to reply to my query with information she received when watching the cheesemaking procedure in Italy:
Cardoon (Cynara cardunculus) is commonly used in Spain and Portugal as a vegetal rennet to coagulate sheep milk cheese. The following notes were obtained at Corfilac in Ragusa, Sicily at Cheese Art 2006 at a hands on demonstration workshop.
The part of the cardoon used to coagulate milk for cheesemaking is the lavender stamens that appear when the plant is in bloom. The stamens may be plucked or cut away from the base with a knife. The stamens should be dried at room temperature for about 3 weeks with periodic stirring to prevent mold growth. The dried stamens will keep for 2 years.
In a mortar and pestle or a blender grind the cardoon stamens to a powder. Suggested use rate is 1 gram of dried flower per liter of milk. The ground stamen should be steeped in room temperature water at the rate of 1 gram stamen to 10 ml water. Steep the mixture for 30 minutes. Strain through a paper filter before use. Add to the ripened milk at 30 C or 86F. i.e. 100 ml solution for 10 liters of milk. Coagulation should occur in 30- 45 minutes. Fresh flowers may also be used and the usage may be slightly reduced since the activity is stronger when fresh. This coagulant is more proteolytic and will produce a softer cheese.Proceed with the make procedure as desired.
This information made a lot more sense to me, and it had precise measurements to follow. I was very excited and I decided to modify a Camembert recipe to use this rennet.
Thistle based rennet produces a bitter flavor if used with cow milk if the cheese is not eaten within a few days. This is because unlike traditional rennet enzymes, which only trim off the ends of the milk casin proteins, thistle rennet cleaves the casin proteins at many points. In cow milk this results in a bitter flavor, but not in goat or sheep milk. Therefore I was destined to make my first goat milk cheese.
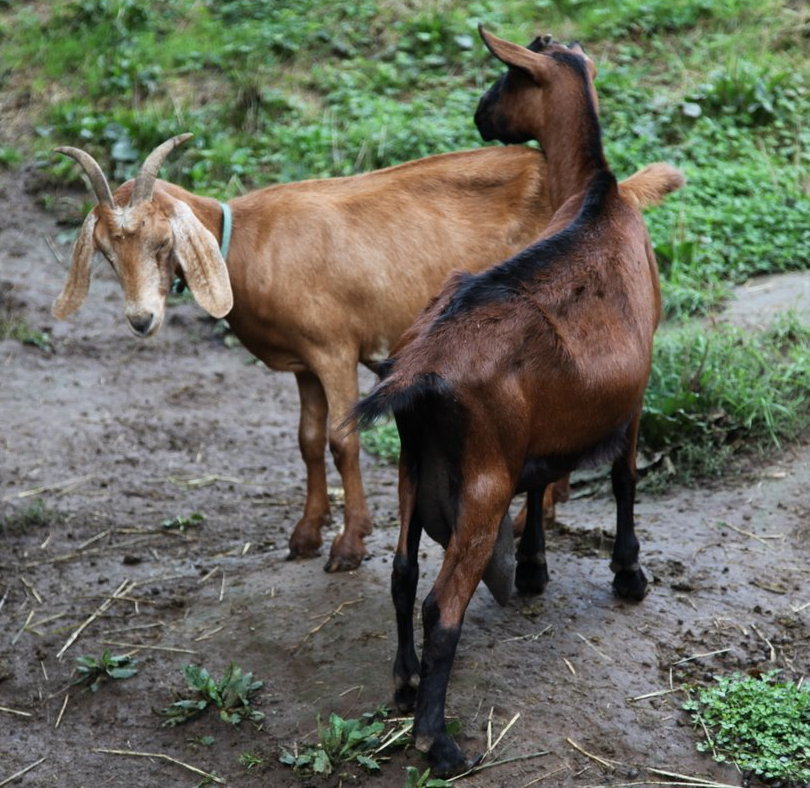
I obtained two gallons of goat milk from a local goat farm called Terra Farma, and I used 1.5 gallons to make cardoon cheese. The remaining half gallon became fresh chevre, a recipe I in which had some confidence and therefore guaranteed me at least one good cheese from my first experiment with goat milk. The milk had a slight hint of the "barnyardy" flavor, which I associate with goat milk, but otherwise seemed very fresh.
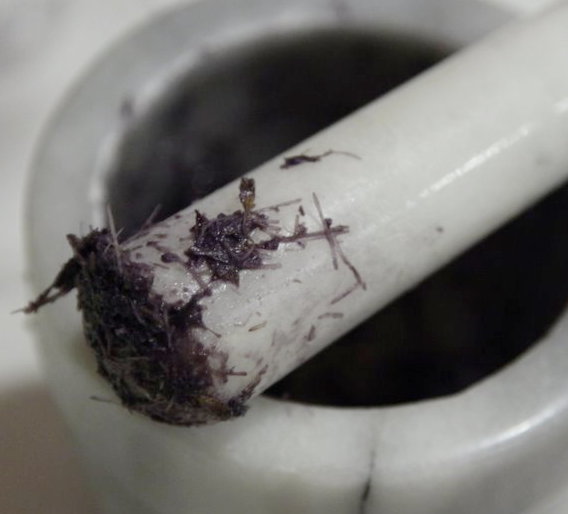
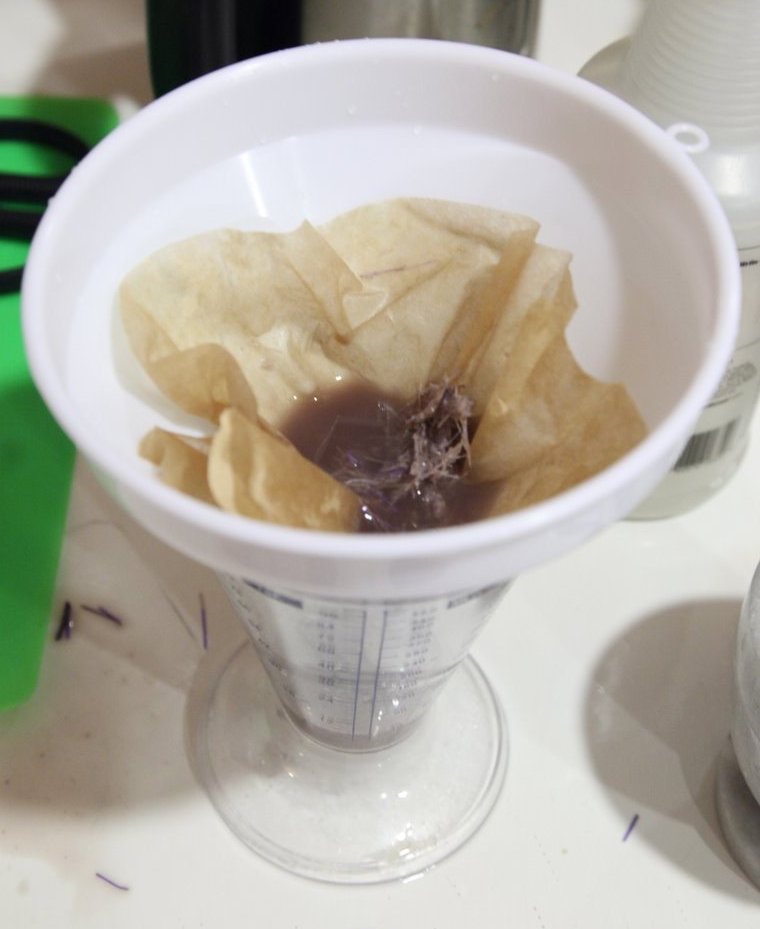
I ground up the stamens with a pestle and mortar, and mixed with 70 ml of boiled and cooled water. I allowed the mixture to steep for 30 minutes while my milk was culturing, then I filtered it through a coffee filter and used it as just as regular rennet.
I must mention that lack of sanitation of this process had me a little concerned. The thistles came in fresh from the garden where the local honey bees had just been busily rooting around in them searching for nectar. I was concerned about deactivating the enzyme and so I used no sanitizers on the thistles other than a rinse in tap water before cutting. A little bit of the local bacterial fauna is bound to get in one’s homemade cheese, and might impart a local flavor unique to the cheesemaker. If any of my cheeses were going to have a local flavor, this would be one.
I modified a Camembert recipe for use with this cheese, as I wanted something that would age quickly. I did not add mold spores to the cheese, as I would for Camembert, as I wanted any flavors derived from the rennet to not be overpowered. I understand that the proteolysis, or protein splitting properties of thistle rennet tends to create a runny cheese. This reminded me of the runny center of Camembert, which is why I choose it as my starting point.
To 1.5 gallons of goat milk warmed to 86F I added 4 ounces of frozen mesophilic culture and I allowed this to culture for 45 minutes. Then I added the 70 ml of rennet prepared as described above. 45 minutes later, I checked the milk to find it nicely coagulated. I was very pleased with myself. Until this point I strongly suspected that this was not going to work, and I was very excited this was not the case.
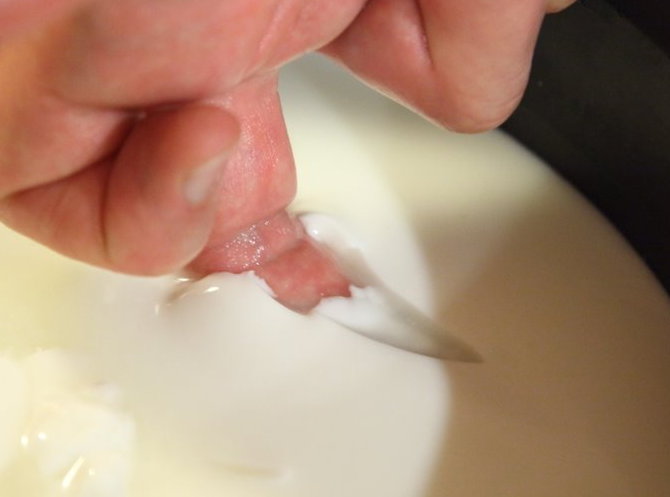
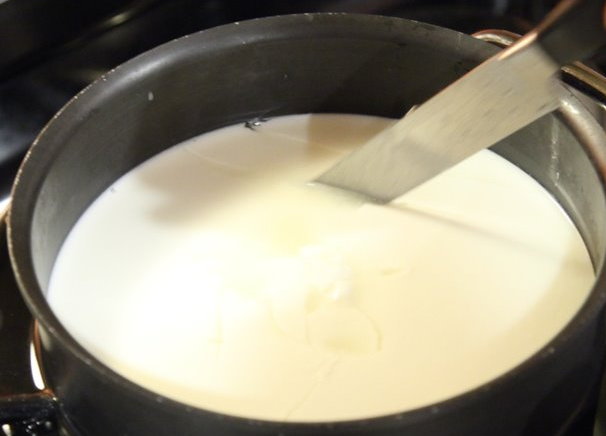
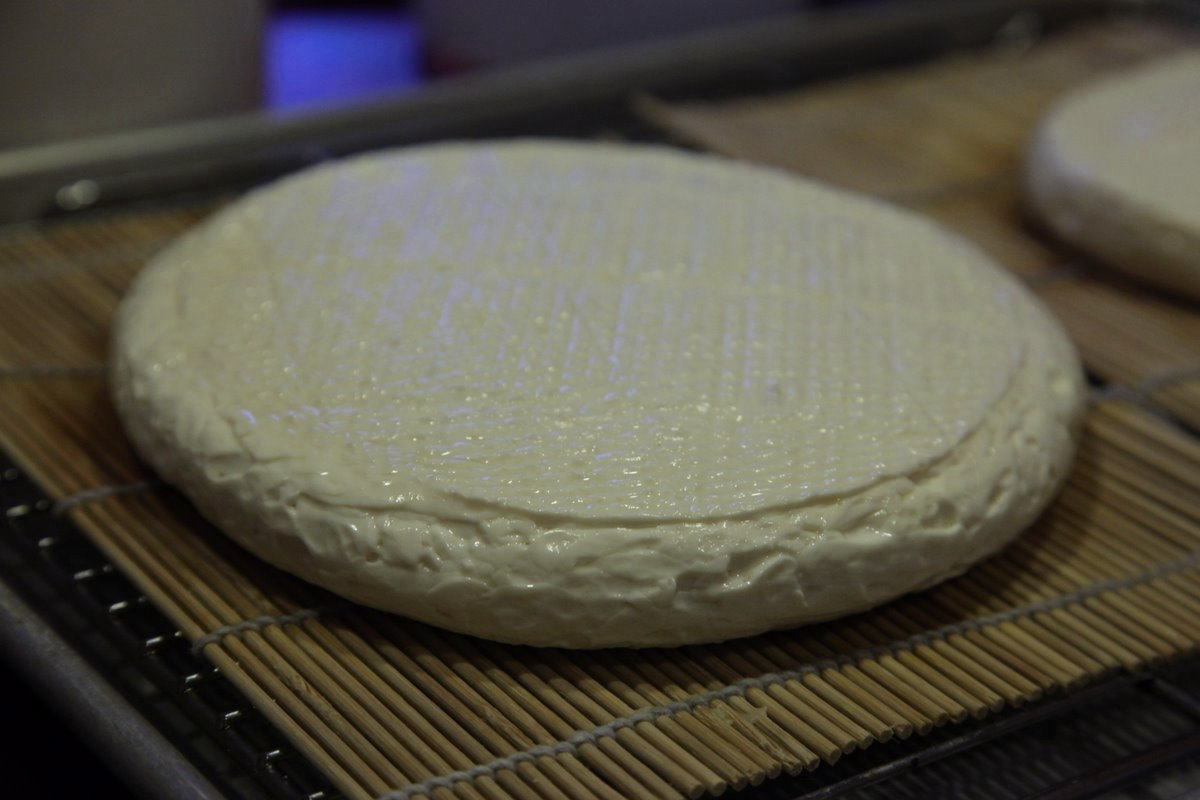
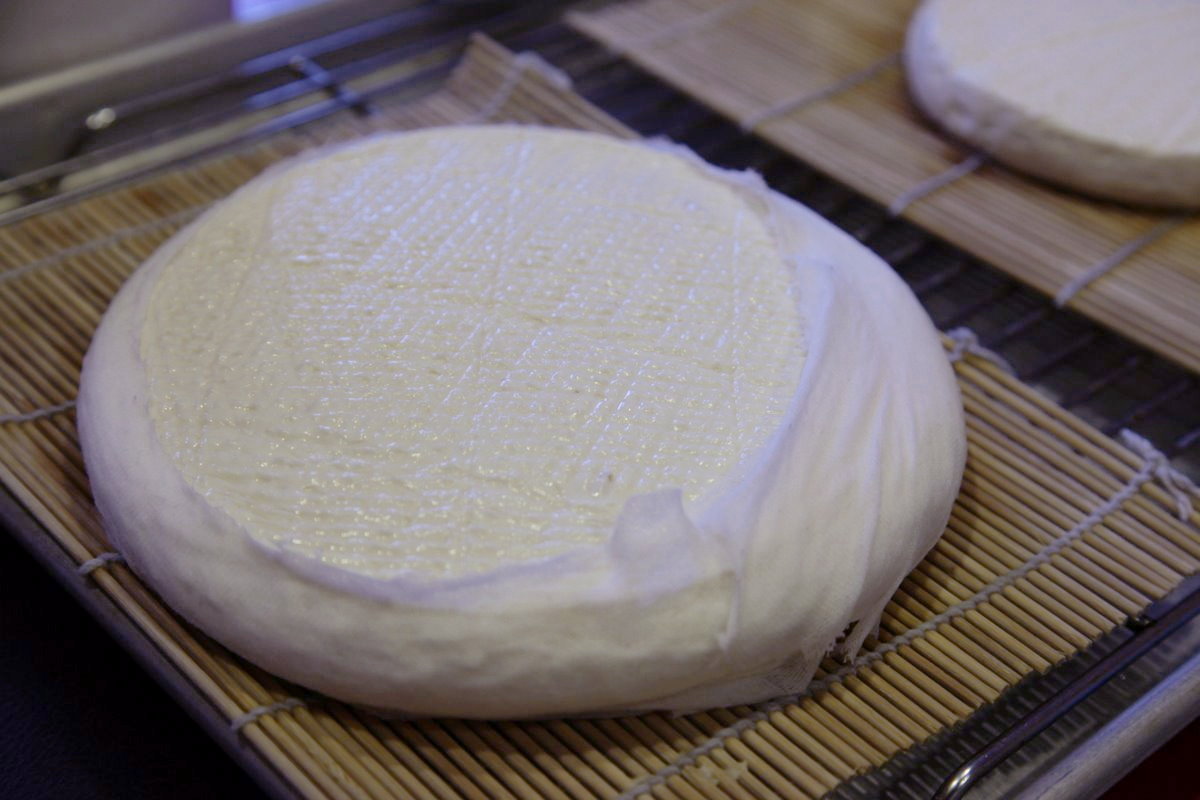
I cut the curd to 1 inch cubes, allowed them to heal for 10 minutes, then stirred gently for 20 more minutes, all while keeping the milk at 86F. After stirring I let the curds settle and mat, and then transferred to round molds on top of draining mats. As I would for Camembert, I did not press the cheese, but rather flipped the molds at regular intervals, allowing the curds to mat under their own weight.After 24 hours of draining, I removed the molds. They cheeses started to barrel immediately. The sides bowed outward and the cheese could not hold its own shape now that the walls of the mold were no longer keeping it confined. I feared that I had not extracted enough whey from the curds during cooking. When I repeat this experiment, I will probably cut to smaller 1/2 inch cubes, or even smaller. To keep the cheeses from barreling too much I wrapped them with a strip of cheesecloth similar to the wrapping I had seen on traditional thistle cheeses in the spring issue of Culture Magazine. Apparently this is a traditional wrapping to keep the cheese whole as the proteolytic enzymes in the thistle rennet turn the center of the cheese very runny.
Since the cheeses seemed too moist I decided to let them dry for two days at room temperature. Then I moved them to my wine refrigerator turned aging cave. Normally I keep cheese in some sort of container in this wine refrigerator because its circulation fans tent to dry out the cheese. This time I waited a week before transferring them to containers, again because I felt the cheeses were too moist.
As I write this, the cheeses have been aging two weeks. One has dried out quite a bit more than I would like while the other one seems perfect except for a little bit of blue mold, which I wiped off with a mixture of vinegar and salt. I hope to age these for at least 6 weeks before trying them, but I will have to keep a closer eye on them from now on. Stay tuned for future updates.Saturday, August 28, 2010
Culture Magazine
Cheese-A-Topia Snapshots
Tuesday, May 11, 2010
Home Yogurt Making
Yogurt is simply milk which has been fermented by a cocktail of lactic bacteria. Yogurt cultures prefer temperatures near 115°F, much warmer than mesophilic cultures which prefer the 85-90°F range. There is some overlap in bacterial species between thermophilic cheese cultures and yogurt culture, and in a pinch you can use yogurt in place of thermophilic culture to make cheese, though the results will not be identical. Technical facts aside, what this simply means is that if you heat milk to 115°F, add some commercial yogurt with active cultures, and maintain the temperature for 12-16 hours you can turn 8 oz of yogurt into 2 quarts overnight.
In Alton Brown's Good Eats episode "Good Milk Gone Bad," Alton describes his mad scientist method of making yogurt which involves a clear container, a heating pad, and a trash can (he demonstrates this and other gadgets on a spot on David Letterman). Being the devoted AB fan that I am, I constructed my own incubator using a flower vase, a heating pad, a towel, a digital thermometer and a light dimmer. It makes fantastic yogurt, but I have to admit it is not something I would recommend to someone who doesn't like tinkering with things like I do.
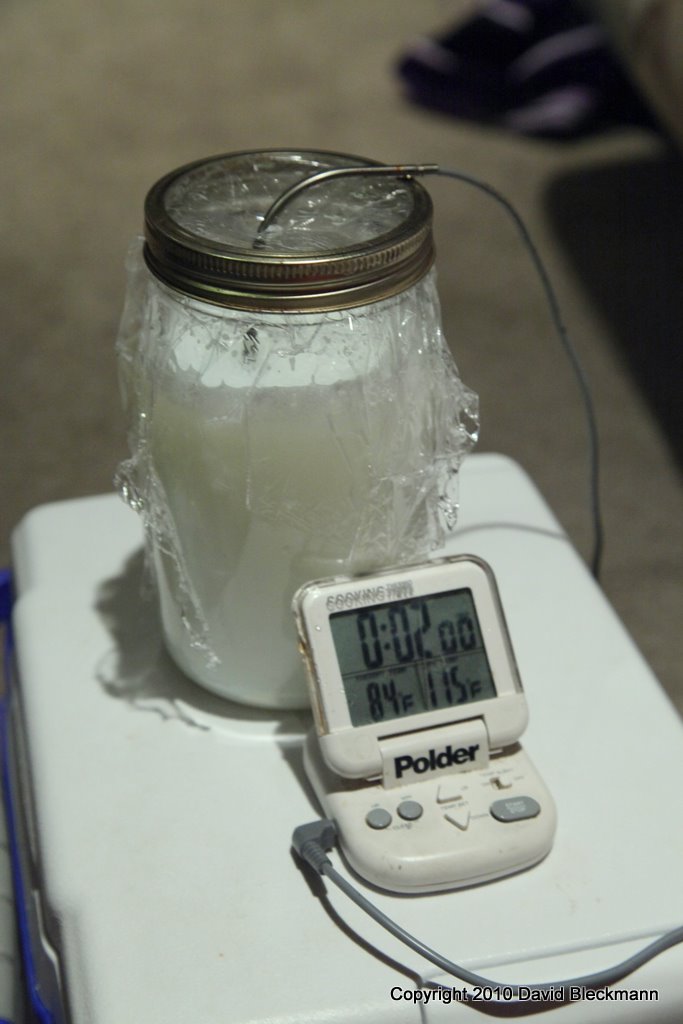
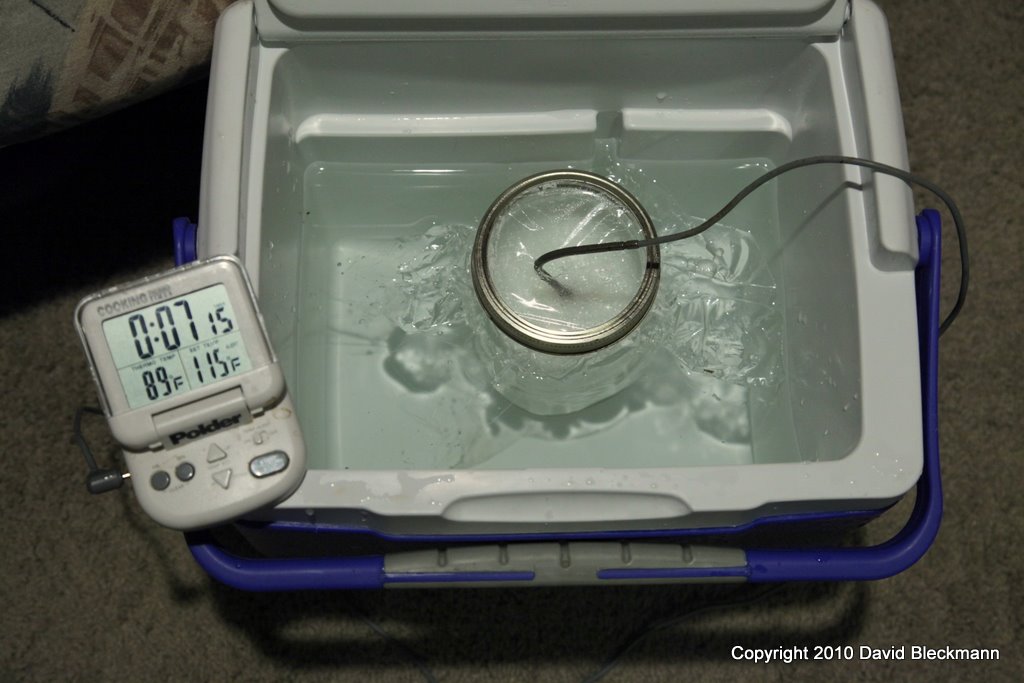
It occurred to me recently that rather than leading a prospective yogurt maker down the mad scientist path described above, you could keep milk warm overnight using the same method I have been using to culture cheese starter: Keeping a jar of inoculated milk in a picnic cooler filled with warm water. Basically you just warm the milk up to about 5°F higher than your target temperature and place in a picnic cooler with water of the same temperature. Over the course of incubation the temperature will drop slowly (the cooler does a pretty good job at maintaining heat), and for the majority of the time it will be in the right range.
So here is my recommended method for making yogurt at home, using easy to find items and no mad scientist contraptions. This method uses the microwave to heat the milk, which is my favorite method since it is easy to control and does not dirty a saucepan, but you can also heat the milk carefully on the stove if you like. If you can use more yogurt, mix up two jars instead of just one.
Homemade Yogurt
Equipment:
- 1 clean one quart mason jar with lid (either standard canning lid or a white plastic freezer lid)
- Dairy thermometer or kitchen thermometer in the 70-120°F range
- Metal spoon that fits into jar and reaches to bottom
- 1 small mixing bowl in which you can place the thermometer and spoon when you are not using them.
- Picnic cooler large enough to hold the jar standing up
Ingredients:
- 4 ounces of yogurt labeled as containing active cultures (you can also use yogurt from a previous batch), or 1 packet of freeze dried yogurt starter
- 1 quart of milk (2% or whole works well)
- 1/2 cup of dried milk powder
- Optional: 2 tablespoons of honey
- Optional: 1 teaspoon vanilla
Method:
All equipment should be clean before starting.Sterilize the jar and lid by filling the jar to the rim boiling water and putting on the lid. Being careful not to burn yourself, open the jar and sterilize the spoon placing it in jar for 2 minutes. Sterilize the mixing bowl and thermometer by filling the bowl with boiling water, running the water over the probe of the thermometer while filling the bowl. After 2 minutes, pour out the jar and the bowl. Set the spoon and thermometer in the bowl when you are not using them so they do not get contaminated.
Add milk to the jar until it is about 3/4 of the way full. Place jar in microwave and heat on high power for 1 minute, then remove, stir with spoon and check the temperature with thermometer. Return to microwave and heat again for 20 seconds, then stir and check temperature again. Repeat until the milk is 120°F. Place lid on jar.
Add dry milk and stir. Add the yogurt or starter and stir. Add the honey and vanilla, if using, for a sweeter yogurt.
Fill picnic cooler with hot water from the faucet. As you are filling, insert the thermometer in the cooler and adjust faucet until the water in the cooler is 120°F. Fill the cooler until the water level is equal to the height of the milk in the jar when the jar is inserted. Do not let the water come over the top of the jar or let the jar fall over.
Place cooler in a location where it will not be disturbed and insert the jar. Close the lid and let the yogurt incubate for 12 to 16 hours, until it is thick. Transfer the yogurt to the refrigerator and use within 2 to 3 weeks.
Thursday, March 18, 2010
Oregon Cheese Festival
If you see a guy walking around with a fancy camera and microphone trying to make it to every booth, come up and say hi!
Tuesday, March 9, 2010
"Without getting super technical, can you tell me how you make cheese?"
I tried, but I did not really do a good job. I gave too many details of the process that I know too well, and I am sure it was too much information for someone who merely knows that cheese comes from milk and just wants to know a little bit more. I disappointed myself because answering a question like this in a simple manner is something I should be able to do. So I resolved to do better next time and decided to write a "how you make cheese" elevator pitch that I can spew in 2 minutes or less. Here it goes:
How was that?
Sunday, February 21, 2010
Sunset on Home Cheesemaking
I was extremely excited to see a mainstream magazine touch on the home cheesemaking phenomenon. I was even more excited that they were hosting a contest for readers to create recipes using these cheeses, with a prize of tickets to California's Artisan Cheese Festival. I have discovered that I love to create recipes from scratch, it really gets the mad scientist in me going.
You can download my Cheese Cocktail recipe here. If you make it let me know what you think. I thought it was a pretty good use of Fromage Blanc, which was one of the easiest cheeses I have attempted.
I also tried to make a savory dish with the ricotta by baking it whole. Sadly it unexpectedly burned in the oven. I will have to work a bit longer on getting that one right.
Monday, January 25, 2010
Rennet from a Thistle?
We discussed that it is possible to harvest your own rennet, and I forwarded him a link to another obsessed cheesemaker, David B. Fankhauser. Dr. Fankhauser shows his attempt to create his own rennet from the stomach of a suckling kid (the goat kind). I thought if Jon were really desperate, this was something that he could try. If seeing where your food comes from does not disturb you, check it out here.
Jon replied and told me he had coincidentally just seen that very page in a recent posting to the blog Serious Eats. In this entry Jake Lahne discusses the use of the Cardoon Thistle as a cheesemaking coagulant.
I have read in American Farmstead Cheese that thistle was used in historic cheesemaking when animal rennet was not available or not desired. Jewish cheesemakers used thistle to create a kosher cheese (avoiding mixing meat and milk). Some cheeses are still made today using this process: Torta la Serena, Torta del Casar, and Serra da Estrela are examples.
I am very curious about trying to use Cardoon as a coagulant. My favorite seed company carries it, so I will try planting some this year. Stay tuned for results this summer/fall.
Saturday, January 23, 2010
Making Feta at Home
For my first live demonstration I chose to make Feta cheese since it was relatively easy and a perfect rennet coagulated cheese for the beginning cheesemaker to tackle. I wanted to discuss the results from using live starter culture instead of direct acidification, show what a clean break looks like, and walk through the process of cutting and cooking curds. I felt the demonstration went really well, and strangely no one complained about my long winded food science talk of enzymes and proteins. Blogger "Food and Books and Stuff" posted a lovely review on her blog.I adapted a Feta recipe I received in the class "A Practical Introduction to Cheesemaking" which I took at Oregon State University. I added an introduction that covered home cheesemaking equipment and sanitation, edited it until it fit on the front and back of a single sheet of paper, and used the results as a handout. You can download it from the Joy of Home Cheesemaking site for your own first attempt at rennet coagulated cheese.
Due to the leftovers from the class and the trial makes I did in preparation, my family has a lot of Feta to consume. Weekends are my turn to make dinner, so I am making Spanakopita.
Saturday, January 16, 2010
The Homebrew Exchange
Anyway, if you see this post today, and happen to be in the neighborhood, drop in and say hi. I will be there with some sample feta cheese that I made for my demonstration next Wednesday. The owners of The Homebrew Exchange are super nice and they are showing a real commitment to carrying cheesemaking supplies. I was really excited to have another place in town to send people who need supplies.
The Homebrew Exchange is located at 1907 N Kilpatrick St, Portland, OR 97217, and the open house starts at 4 p.m. Here is a direct link to the announcement on their web site.
Tuesday, January 5, 2010
DIY Cheesemakers in Portland
I attended my first meeting last November and met Gayle Starbuck, who led a class on making fresh cheeses with direct set cultures. She and I talked after the class and I agreed to help set up an email list to help communicate between the meeting participants. That list now lives as a Google group, which can be found at diycheese.org.
I also talked to Luan Schooler after the same DIY meeting. Luan is one of the owners of Foster and Dobbs, and from what I can tell she started hosting the DIY meetings in 2008. I offered to do a cheesemaking demonstration. After an exchange of emails, I am now demonstrating making Feta on January 20th, 2010. I am very excited.
This weekend I have plans to visit a local goat farm to acquire some fresh raw milk and do a trial cheesemaking run at home. If the results are good, they will show up at the meeting on the 20th. I am also going to do a practice run with store bought cow milk to hopefully show the difference between the two milk sources. The demo will done with store bought milk, as that is what most people will be using in their own kitchens.
So if you are in the Portland area, come join the fun. See the details at diycheese.org.
Sunday, November 29, 2009
Not all Muensters go to heaven
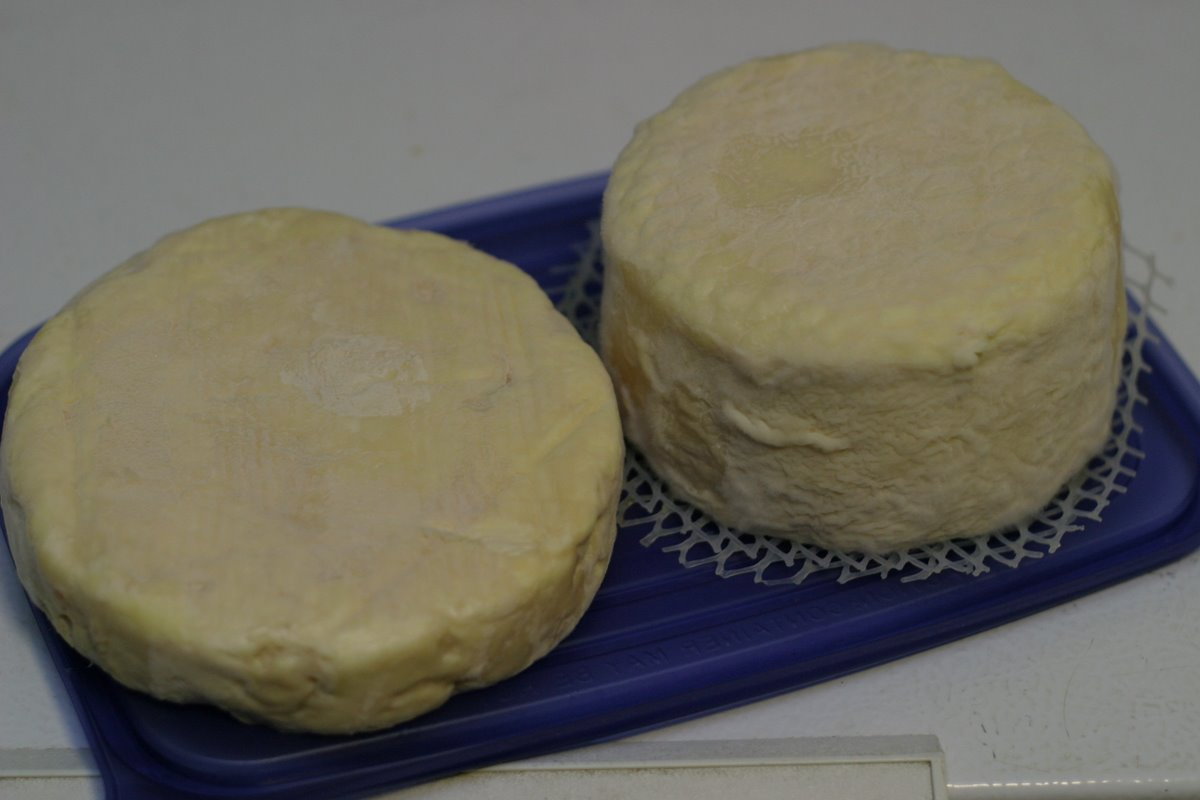
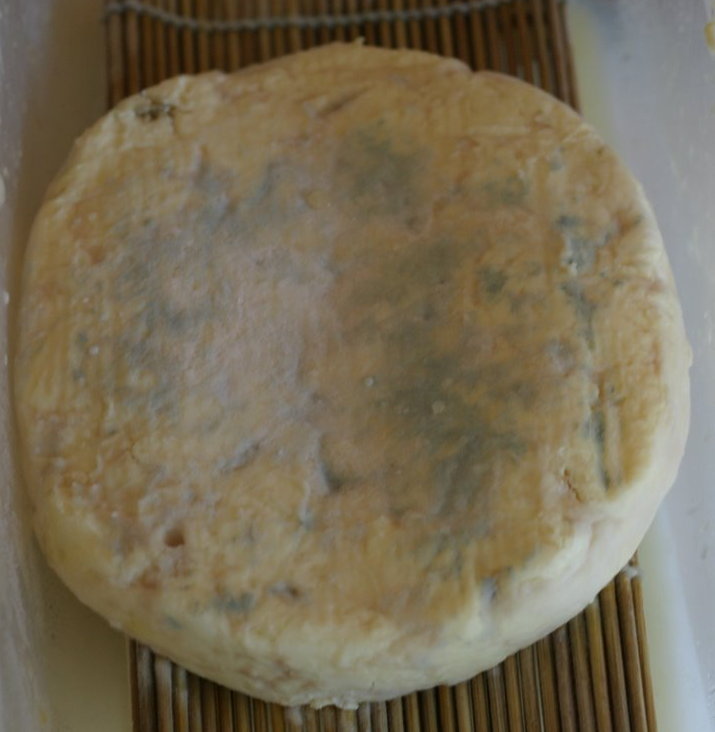
After 4 weeks I had a surface that was very slimy, with a strong Limburger smell.
There was no characteristic orange growth except for one spot on the smaller of the two cheeses.
I posted in cheeseforum.org a request for advice and a little feedback, the best of which came from user francois who stated that I did not have b.linens growing, but instead a strong yeast infection. According to him, the smell I thought was coming from b.linen growth was coming from protein breakdown due to the yeast.
I tried scraping off the layer of slime and re-washing with a brine solution.
I went on vacation for a week, and when I returned I found a very smelly, slimy mess of a cheese. The smaller cheese had grown some blue mold and the larger was slimy again. Slicing into the larger cheese revealed a firmer paste and more horrible smell. I braced myself and tasted it. Extremely strong and unpleasant ammonia flavors forced me put my open mouth under the kitchen faucet to try to rinse foul substance out of my mouth. This was a home cheesemaking attempt gone horribly wrong.
I will attempt this again in a couple of months, and try to avoid the pitfalls I encountered this time around.
Anyone need some cheese?